KUSANAGI 9 now supports PostgreSQL versions 14 and 15, allowing users to upgrade PostgreSQL and run CMS platforms like Drupal—not just WordPress—on PostgreSQL. Using the kusanagi dbinit psql and kusanagi upgrade psql commands, you can not only switch the database in use but also upgrade or optimize its configuration.
Keep in mind, however, that switching databases requires a backup, and data migration must be handled manually. Additionally, the kusanagi upgrade psql command supports upgrading PostgreSQL versions, but does not support downgrades.
Back up the database.
Both kusanagi dbinit psql and kusanagi upgrade psql perform significant changes to your database environment. While KUSANAGI is designed to ensure stability, there is no guarantee that issues won’t arise.
Before running either command, you should always back up your database. Here are two common ways to do that:
Take a Snapshot
Most cloud providers offer a snapshot feature for VM disks. Here’s how to do it with major providers:
AWS
- Log in to the AWS Console
- Open the EC2 Dashboard
- Select “Volumes” from the menu
- Choose the target volume
- Click “Create Snapshot” from the “Actions” menu
Azure
- Log in to the Azure Console
- Select the target Resource Group
- Choose the target disk
- Click “Create Snapshot” from the top menu
GCP
- Log in to the GCP Console
- Select the target project
- Go to “Disks” from the menu
- Choose the target disk
- Click “Create Snapshot” from the top menu
Snapshots are easy to create and restore. To recover your environment, simply create a disk from the snapshot and attach it to your VM.
Thus, the cloud vendor provides the ability to take snapshots of disks, and this feature can be used to easily take snapshots.
If you want to recover, you can create a disk from the snapshot and attach the disk to the target VM to easily restore it to the state where the snapshot was taken.
Take a Database Dump
You can also export your database as a dump file.
MariaDB
Use mysqldump to export data:
mysqldump -h localhost -u root -p (database_name) > (output_file_path) To restore:
mysql -u root -p (database_name) < (output_file_path) You’ll be prompted to enter the root password when executing each command.
PostgreSQL
Use pg_dump to export data:
pg_dump -h localhost -U postgres -d (database_name) > (output_file_path) To restore:
psql -h localhost -U postgres -d (database_name) -f (output_file_path) Always ensure a backup is taken before changing database settings or versions.
Switching from MariaDB to PostgreSQL
If your current setup uses MariaDB and you want to switch to PostgreSQL, you can use the following command:
kusanagi dbinit psql
Important Note:
This command switches the database engine but does not migrate your data. If you already have data in MariaDB, you’ll need to manually migrate it to PostgreSQL. The same applies when switching back using kusanagi dbinit mariadb.
Let’s say your current environment was initialized with MariaDB:
As you can see, MariaDB 10.5 is installed and PostgreSQL is not.
Now we will switch the database to PostgreSQL using kusanagi dbinit psql.
# kusanagi status

KUSANAGI Version 9.4.2-1.el8

(Cloud name)


:

(omission)

:

*** (active) mariadb : mariadb10.5 ***

* mariadb.service - MariaDB 10.5.22 database server

   Loaded: loaded (/usr/lib/systemd/system/mariadb.service; enabled; vendor preset: disabled)

   Active: active (running) since Thu 2023-10-12 14:24:59 JST; 1min 3s ago


*** (inactive) psql :  ***


*** (inactive) pgpool-II :  ***


:

(omission)

:

status completed.

#
This confirms that MariaDB is active and PostgreSQL is not yet installed.
Now let’s switch to PostgreSQL 13 using the following command:
# kusanagi dbinit psql --use psql13 --dbrootpass (DB admin user password)

Last metadata expiration check: 0:09:31 ago on Thu Oct 12 14:23:56 2023.

pgdg-redhat-repo-latest.noarch.rpm               12 kB/s |  13 kB     00:01

Dependencies resolved.

================================================================================

 Package                Architecture Version           Repository          Size

================================================================================

Installing:

 pgdg-redhat-repo       noarch       42.0-35PGDG       @commandline        13 k

:

:

dbinit psql completed.

dbinit completed.

#
If you see dbinit psql completed. and dbinit completed., the database switch was successful.
Next, run kusanagi status again to verify the environment.
# kusanagi status

KUSANAGI Version 9.4.2-1.el8

(Cloud name)


:

(omission)

:

*** (inactive) mariadb : mariadb10.5 ***

* mariadb.service - MariaDB 10.5.22 database server

   Loaded: loaded (/usr/lib/systemd/system/./mariadb.service; disabled; vendor preset: disabled)

   Active: inactive (dead)


*** (active) psql : psql13 ***

* postgresql-13.service - PostgreSQL 13 database server

   Loaded: loaded (/usr/lib/systemd/system/postgresql-13.service; enabled; vendor preset: disabled)

   Active: active (running) since Thu 2023-10-12 14:34:23 JST; 1min 27s ago


*** (active) pgpool-II : pgpool44 ***

* pgpool.service - Pgpool-II

   Loaded: loaded (/usr/lib/systemd/system/pgpool.service; enabled; vendor preset: disabled)

   Active: active (running) since Thu 2023-10-12 14:34:40 JST; 1min 11s ago


:

(omission)

:

status completed.

#
PostgreSQL is now active, and MariaDB has been deactivated.
Provisioning a Drupal Site on PostgreSQL
Let’s provision a Drupal environment using PostgreSQL:
# kusanagi provision --drupal --fqdn (FQDN) --noemail --dbname drupal_test --dbuser drupal_user --dbpass (DB User password) drupal_test

Target directory is /home/kusanagi/drupal_test.

CREATE ROLE

provision postgresql completed.

provision db completed.

Last metadata expiration check: 0:18:48 ago on Thu Oct 12 14:40:28 2023.

:

(omission)

:

Provisioning of drupal_test completed. Access (FQDN) and install drupal.

provision completed.

#
Visit the specified FQDN in your browser, and you’ll see that Drupal runs successfully on PostgreSQL.
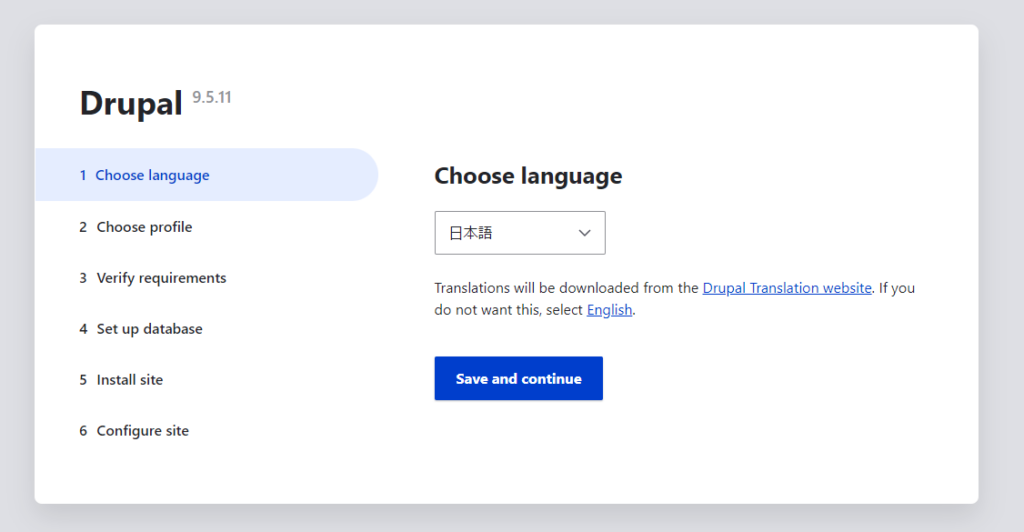
As you can see, Drupal is running properly on PostgreSQL.
For the switch, we used the following command:
kusanagi dbinit psql –use psql13 –dbrootpass (your DB admin password) Here, –use psql13 specifies the version of PostgreSQL to install—in this case, PostgreSQL 13.
For other supported versions, refer to the KUSANAGI 9 command manual.
Optimizing PostgreSQL Configuration
In addition to switching the database, kusanagi dbinit psql can also optimize PostgreSQL settings.
If PostgreSQL is already in use, simply running kusanagi dbinit psql without any options will perform the optimization.
# kusanagi dbinit psql

dbinit psql completed.

dbinit completed.

#
Upgrading PostgreSQL Version
Now, let’s take a look at how to upgrade to a newer version of PostgreSQL.
In the earlier step where we switched from MariaDB to PostgreSQL, we used the following command with the –use psql13 option:
kusanagi dbinit psql –use psql13
As mentioned, this installs PostgreSQL 13.
Let’s now upgrade PostgreSQL 13 to PostgreSQL 14 using the kusanagi upgrade psql command:
# kusanagi upgrade psql --use psql14

Last metadata expiration check: 0:44:35 ago on Thu Oct 12 14:40:28 2023.

Dependencies resolved.

Nothing to do.

Complete!

...

upgrade psql completed.

upgrade completed.

#
If you see upgrade psql completed. and upgrade completed., the upgrade was successful.
Now let’s check the environment using kusanagi status:
# kusanagi status

KUSANAGI Version 9.4.2-1.el8

(Cloud name)


...


*** (inactive) mariadb : mariadb10.5 ***

* mariadb.service - MariaDB 10.5.22 database server

   Loaded: loaded (/usr/lib/systemd/system/./mariadb.service; disabled; vendor preset: disabled)

   Active: inactive (dead)


*** (active) psql : psql14 ***

* postgresql-14.service - PostgreSQL 14 database server

   Loaded: loaded (/usr/lib/systemd/system/postgresql-14.service; enabled; vendor preset: disabled)

   Active: active (running) since Thu 2023-10-12 15:25:52 JST; 2min 42s ago


*** (active) pgpool-II : pgpool44 ***

* pgpool.service - Pgpool-II

   Loaded: loaded (/usr/lib/systemd/system/pgpool.service; enabled; vendor preset: disabled)

   Active: active (running) since Thu 2023-10-12 15:26:15 JST; 2min 19s ago


...

status completed.

#
As shown above, the database has been successfully upgraded from psql13 to psql14.
This demonstrates how easily you can upgrade PostgreSQL using KUSANAGI.
⚠️ Note: The kusanagi upgrade psql command supports upgrades only—it does not allow downgrading.
Please refer to the KUSANAGI 9 manual linked below for a list of supported PostgreSQL versions.
Using PostgreSQL from Initial Setup
Although this is outside the scope of dbinit or upgrade, if you already know from the beginning that you want to use PostgreSQL, you can specify it during the initial KUSANAGI setup using:
kusanagi init --passwd (kusanagi_user_password) --nophrase --dbrootpass (db_admin_password) --psql13 For more on kusanagi init, see our earlier tech column:
How to initialize KUSANAGI easily with kusanagi init
Conclusion
With the kusanagi dbinit psql and kusanagi upgrade psql commands, KUSANAGI 9 allows you to:
- Switch from MariaDB to PostgreSQL
- Optimize PostgreSQL settings
- Upgrade to newer PostgreSQL versions
KUSANAGI now supports PostgreSQL alongside MariaDB, making it suitable for CMS platforms like Drupal as well as WordPress. Give it a try and make full use of this flexibility in your projects.